Alpakka 1
OverviewManualGalleryComponents
Alpakka manual
DIY & Hardware
Setup
References
Profiles
Flight (soon)
RTS (soon)
Developer
Firmware development
This manual page (and the following pages) explains how to setup and use the Alpakka Firmware, and to setup a developer environment both from the software and hardware point of view.
Developer Kit
The Developer Kit is a simple DIY device that allows the developer to connect to the controller, get logs, send commands, and use a physical reset button. This is not required to hack the Alpakka, but it helps a lot.
The components for the reference developer kit are:
- USB to TTL serial cable. Like this one
- Mini-breadboard. Like this one
- Reset button. Like these
(Cable colors may be different in your setup)
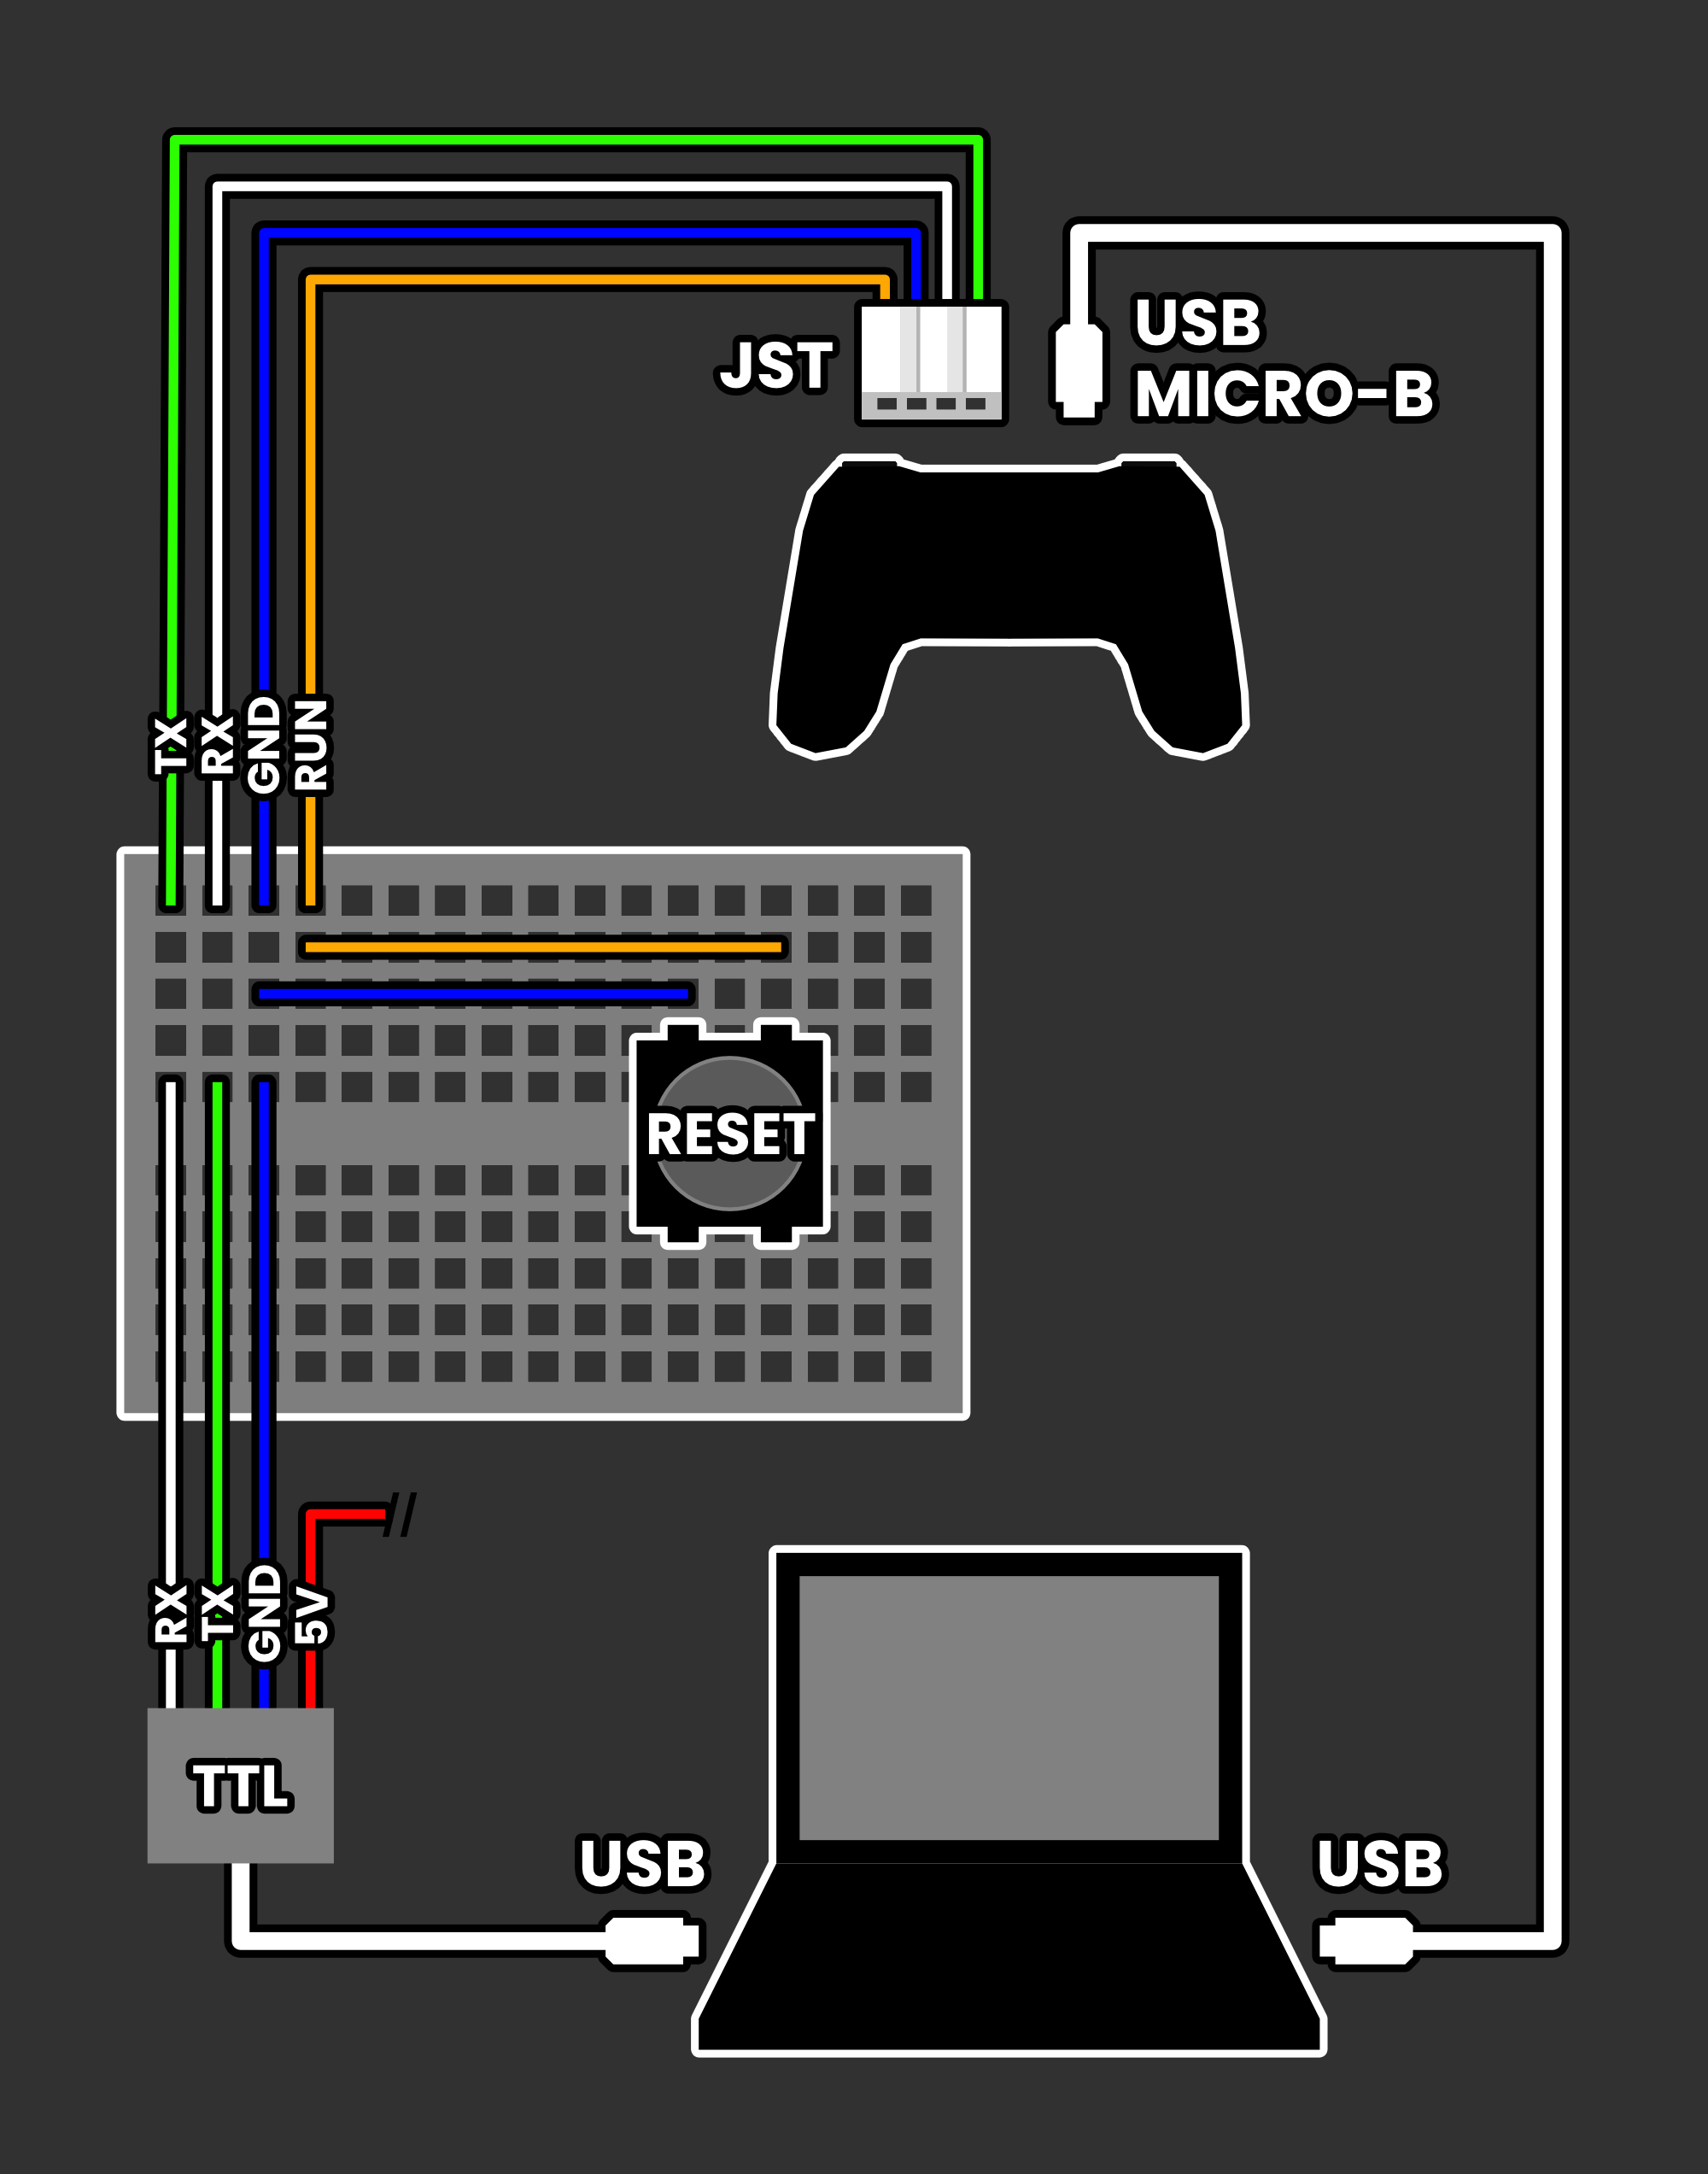
With this setup, the reset button works as:
- Single press: Restarts the controller.
- Double press: Controller goes into Bootsel mode (ready to be flashed).
Other dev-like methods to put the device into Bootsel
- In devices with Marmore core: Double press the reset button next to the USB port (see Wireless page).
- In the Raspberry Pico: Hold the white button while connecting the USB cable.
- With a USB serial cable: Send B character.
Software setup & development cycle
Check Development in Linux or Development in Windows for further instructions.